Friday, December 19, 2008

Christmas tags


OK so I am a bit addicted to making tags this year, so I joined in a challenge over at Allcraftz today, the rules were that there had to be at least 3 tags, they had to be in the same colour scheme & there had to be at least 1 christmas tree, 1 dove & some stars. These are what I came up with, the background I made a few weeks ago with Glimmer Mist & my own home made Glimmer Mist (a concoction of PearlEx, gum arabic & water, see my post back at the beginning of November) & these ones I masked using a flourish design I cut on my PI on cardstock (disposable! :) ). I stamped the backgrounds with various stamps (including a music stamp from my new set from Stamp-It!), embossed them with versamark & distress embossing powder in Fired Brick & distressed the edges & inked them with Vintage Photo Distress ink & then embossed them as well. The christmas tree & dove were both stamped with Versamark & embossed with Peeled Paint embossing powder & then inked & edged with a krylon gold leafing pen. I also added various metal embellishments, some beaded trim & some Prima christmas flowers & a button push through by 7 Gypsies. I think they turned out really well, I love them!

Thursday, December 18, 2008

2 more cards ..


I know it's christmas time & most people are doing christmas cards, but hey, I always like to be different, so here are 2 cards I made yesterday that aren't christmas related.

The first one (well I hope its the first one, I always seem to upload them in the wrong order)I created the background by using black gloss cardstock & swirling copper alchol ink mixative onto it which gave it a rather gorgeous effect. The black square frame is just cardstock & black opals which have been stamped to give the texture. The cameo is a mould done with Delight & it, along with the photo corners & little plaque with the word on it have been coloured with a Krylon Copper pen.

The second one I decided to do because I had seen a card somewhere months ago with similar colours (but I have NO idea where now, in reality the colours are probably completely different, but this is what I remember LOL) & I really liked the colour scheme so I decided to give it a go. I used one of my Paper Artsy stamps as the central design, coloured it with a waterbrush & my Marvy markers & then sponged distress inks on around it in different directions to create the textured effect. I think it looks great & love the effect, I will be trying another one with different colours soon!

Tuesday, December 16, 2008

Christmas cheer


I made these few things as a Wishing Well wish on a forum I post on, the notebook cover has been embossed on the cuttlebug on C'oredinations cardstock which I sanded & then inked with my distress ink (Vintage Photo) to give the crocodile skin effect (I got the handbag shape idea from someone on a Yahoo group I am a member of). Both it & the christmas album have been bound on my BIA, the christmas album has been painted with polished pigments in that beautiful green colour & finished with Maya Road felt flowers.

The christmas baubles were also made using polished pigments, Myléne (from Mill Lane Studio) did a class on these last christmas which sadly I missed, but I did get told about it, so being the inquisitive & ingenious person I am, I checked out google & found some instructions on doing it, & here they are.

The card is white cardstock embossed on the cuttlebug & then coloured with Twinkling H2Os & PearlEx for the background & highlighted with a Krylon Gold leafing pen & bling.

I do hope the recipient likes them & they make her christmas a little brighter :) .

Sunday, December 14, 2008

I've won an award ...


One of my blogging friends has given me an award - the Spreader of Love. The rules are you must post the award on your blog, name your bestower, then bestow the award upon 6 other bloggers and leave a message on their blog that they've received the award.

Thank you Myléne Mill Lane Studio for honouring me with this award. :)

It is now my privilege to pass it on to some other wonderful bloggers so that they too can spread the love, they are :

Dan from My Crafty Life - for always having useful hints, tips & videos on techniques plus being generous enough each week to share a freebie cutting file with everyone.

Pam from Yorkie Mom's Creative Corner for always creating such beautiful cards.

Bec from Proof of our Existance for always encouraging me & being so supportive when I wasn't sure where my scrapping was going. Plus her work is absolutely fantastic! :)

Jay from Indigo Inklings for her cuttlebug techniques & tutorials, they are always inspiring!

Liz at Red Crystal Star who's a great mate & I love her work.

And lastly Marnie at Marnie's Alter Ego because she is the most lovely lady & I love keeping up to date what's going on with her :) .

I wish I could give it to more people (& back to Myléne) but I can't so those are the ones I have chosen. Hope you enjoy being recipients! :)

Monday, December 8, 2008


As the end of the school year draws near & christmas gets closer everyone gets busier & busier & our family is no exception. But I did find time to participate in an online class called "Stories in Hand" by Jessica Sprague. One of the first things we had to do in class was create a binder to store our notes & whilst she supplied some downloadable paper & other stuff to simply stick on a specific pre-bought binder, I (of course LOL) had to be different ;) . The original binder was supposed to be 6"x6" but I bought a 7"x9" one & decorated it myself. All of the internal pages also had to be altered & I am still working on some of those, but here are the pics of the outside anyway. Its just a plastic folder, so I gessoed it, then painted it & attached the paper I chose (Bo Bunny Beautiful Life) & put on the ribbon & title etc. It looks really lovely & Im very happy with the way it turned out.

Wednesday, November 5, 2008


It's been a while now since I updated, we have been very busy with school stuff & then we had the boy's Halloween party last weekend. Since then I luckily have had some time to create, so using a method of making my own Glimmer Mist sent to me by my friend Irma, I made some christmas tags. Sadly as with previous posts you can't see the glimmer & sparkle that these tags have but they still look pretty anyway. They are just done on some card that has been coloured with Distress Inks & some stamped images. Anyway I hope you like them, I loved them so much I have started making some using different colours & combinations, so look out for those over the next few days.

Friday, October 17, 2008


Once again 2 posts in one day, but I just had to post a pic of this card I made today. Sadly, like the PearlEx cards below you can't see the true beauty of this card but you'll just have to trust me when I say it's stunning & probably one of my favourite cards I have ever done :) . The background is done with 3 colours of Glimmer Mist, Cinnamon, Twilight & Autumn & it really sparkles. The patterned paper is from Kaisercraft & the clock face is from a set of stamps that my friend Marnie sent me (thank you Marnie! :) ) that has been inked with Distress Ink, Glimmer Mist & Moon Shadow Mist. The clock is raised up with foam tape to make it 3 dimensional & the flowers have a small section of brown velvet rikrak underneath them. Title cut on my PI.

I love it :) .
Well it took me about 4 days to finish off all the invitations but I finally got them done. With a little bit more time on my hands I decided to play with my embossed acetate, PearlEx & Glimmer Mists/Moon Glow sprays & these cards are what I came up with. Dream was my first attempt, I did this one with the PearlEx on the back of the acetate & it gave a very shiny, metallic looking effect. I used MoonGlow Glitz Spritz & MoonGlow Starburst Stain on the background of the card.


Next I tried the PearlEx on the front of the acetate, putting the colour on the swirls of the paisley design, the red russet first & then filling in the spaces with a mixture of sunset & antique gold & got a nice sparkly effect as on the front of the card with the heart. I used MoonGlow Moon Shadow Mist & Glimmer Mist on the background of this one.


Then I tried putting the PearlEx on the front of the embossed acetate again but this time I just dropped colours randomly all over first & brushed them in starting with the Pearl White, then the duo green/blue & lastly the spring green. This produced a fabulously lustrous finish that really sparkles & is by far my favourite card out of the 3 of them.


BTW, the scroll, sentiment & "sun" shape on the Just For You card were all done on my PI. None of the photos do these cards justice, they are really lovely & sparkly which you cant pick up with a camera very easily.

Monday, October 13, 2008


Earlier in the year the boys missed out on having a birthday party, so we decided that this year we would have a Halloween party instead. So I set about to make some invitations for it this weekend & came up with this card (prototype Mark III LOL). I converted a file posted by Freedom on UK Scrappers, tweaked it a bit & added my text & came up with this. I think it's pretty cool (even if I do say so myself!), thanks Freedom for sharing the original file on UKS!

Friday, October 10, 2008


Here I am again with 2 posts in 1 day, but I have been getting alot of cards made in the last few days so I thought I would add them to my blog. The backgrounds are all made using Tim Holtz distress inks except for the one with the butterfly which is done with his alcohol inks. I just love the effects you can get with these inks & I love the colours that they come in. The heart is made with Opals embossing powders, the "For You" title was cut on my PI & I have used some of my HUGE stash of stamps on the backgrounds (including my new script stamp again).

I made this card using a technique that I learnt from Myléne Hillam (you can see her blog in my blog links) using something called tyvek. It gives a fabulous textured background to a card as you can see, I really love the effect you get from it.

Sunday, October 5, 2008


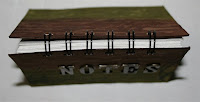
I made this notepad today using distress ink, my new script stamp (thank you Sharon!) & my new Bind-it-All that I got for my birthday. Thanks Dan99 for the inspiration! :)

Thursday, September 25, 2008


Two posts in one day - I've gone crazy LOL. This one is of some 3D xmas baubles I have made on my PI, the middle gold & red metallic one was made with a file made by the lovely Alisa http://www.de-signsmadebyme.com.au/ - the other plain gold ones were a flat 2D file from UK Scrappers that I converted to WPC, tweaked to make it mirror image & then made into 3D. The gold ones were cut on some scrap cardstock that a lady named Loraine from our cutting group gave me - thank you Loraine!


I recently made a box on my PI to send to a lovely lady as part of a surprise Wishing Well & I sent it off without taking a photo. So I made this one this afternoon, it's pretty much the same except it has a different ribbon across the box on it. I love the little flowers, both cutting files came from UK scrappers & I converted them & cleaned them up for the PI.

Wednesday, September 10, 2008


Some more cards I made today - all either cut on my PI or cuttlebugged. All the bows were tied using a Bow Easy - thanks to Mylene for her excellent tutorial these are my first attempts at using it, not bad, huh? :) .


Here is an interesting card I did the other day. I used my cuttlebug to emboss a sheet of chipboard & then painted it with white acrylic paint & sealed it. I then used my twinkling H2Os in 2 similar shades of pink to highlight the raised & sunken areas & a white sparkly H2O over the background. I then sealed it & put some red mesh across it before finishing it off with a heart covered in white opals embossing powder.

Tuesday, September 9, 2008


Here are 2 simple cards I did on the weekend. Both have an element cut on the PI, the gold photo corners on the purple heart card & the white background lace on the pink, black & white flower card. The purple heart with gold is done using Opals embossing powder & both cards have a background that has been run through the cuttlebug.

Sunday, September 7, 2008


OK I may as well start with the cover of my altered book which I did a couple of weeks back. I gessoed the cover & sponged on polished pigments & paints for the background then added the picture & blended it in. Lastly I put on the title (I made the IMAGINATION letters down the right hand side from moulds) & covered the spine with gold leaf.


This is my first attempt at an altered book (actually, an altered anything!). I used the title Tales of Mystery & Imagination (the name of an anthology of short stories & poems by Edgar Allan Poe) because that is exactly what I am trying to show - the idea is that the pages will show the inspiration & imagination that I use to create different things.


Saturday, September 6, 2008

Like most other people when they get to that little text box, I have no idea what I am doing, no idea where this is going to go & no idea what I am going to write but I have to start somewhere, so it may as well be with this first post :) .